Logitech M570 Trackball Ubuntu Setup
Posted on Sun 13 August 2017 in setups
Wikipedia has a good article about trackballs, their history (they were 1st called Rollerballs) as well as some of the reasons people use them (versus using a mouse).
One of the main reasons for using a trackball is ergonomics (design effiency and comfort). This was mostly the reason I decided to add one to my workspace. One other benefit of a trackball is that you can use them even if your desk is covered in papers (not that my desk is ever like that).
After reading a bit about trackballs and the reviews of the various models available I decided to pick up a 'lightly used' 2nd hand Logitech M570.
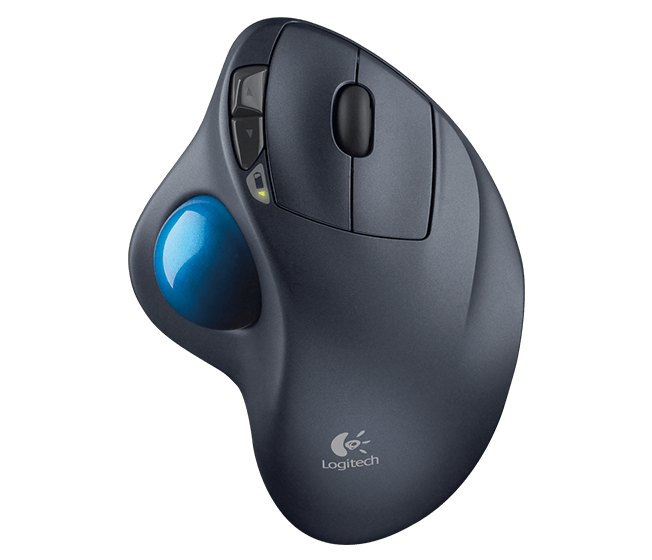
The 2 small buttons with the arrows on them are the forwards and back buttons. I have added the forward button as a modifier to use the trackball to scroll horizontally.
This post will document the setup process that I went through to get the trackball working with ubuntu 16.04.
The trackball comes with a 'Logitech Universal Receiver' (basically, a usb dongle).
Before configuring the M570 it's best install a piece of software called Solaar which works with the receiver and the devices.
Here's a description of what it does from Solaar's website.
Solaar is a Linux device manager for Logitech’s Unifying Receiver peripherals. It is able to pair/unpair devices to the receiver, and for most devices read battery status.
It comes in two flavors, command-line and GUI. Both are able to list the devices paired to a Unifying Receiver, show detailed info for each device, and also pair/unpair supported devices with the receiver.
So off we go and install Solaar via the terminal....
sudo apt install solaar
Next we create a configuration file called 99-m570logitech.conf in /usr/share/x11/xorg.conf.d/
sudo vim /usr/share/X11/xorg.conf.d/99-M570Logitech.conf
To this newly created file we paste in the following text.
Section "InputClass"
        # User-defined name for this profile/input class
        Identifier      "Logitech M570"
        # Tailed /var/log/Xorg.0.log to figure out the following
        MatchProduct    "Logitech M570"
        MatchIsPointer  "on"
        MatchDevicePath "/dev/input/event*"
        Driver          "evdev"
        ## OPTIONS
        Option "SendCoreEvents" "true"
        # EmulateWheel refers to emulating a mouse wheel using the trackball
        Option "EmulateWheel" "true"
        # Set to middle-click
        Option "EmulateWheelButton" "9"
        # Affects distance trackball needs to move register scroll movement
        Option "EmulateWheelInertia" "10"
        # Timeout between EmulateWheelButton click and "emulation" to begin
        Option "EmulateWheelTimeout" "200"
        # Comment out XAxis if you don't want horizontal scroll
        Option "ZAxisMapping" "4 5"
        Option "XAxisMapping" "6 7"
        Option "DeviceAccelProfile" "2"
        Option "AdaptiveDeceleration" "2"
        Option "VelocityScale" "1.7"
EndSection
Save and close this file. Next, reboot your computer.
After the reboot the M570 should be working with the small forward key as the modifier for horizontal trackball scrolling.
If you want to change the modifier button you need to figure out which button on the M570 corresponds to which number. You can use the command...
xev | grep button
This creates a box on screen. Click the box and you can see the corresponding button number in the terminal. (The grep button bit filters the information to make it more readable.)
Once you know which buttons are where. You can alter the line...
Option "EmulateWheelButton" "9"
Substituting the number "9"(The forward arrow button) for the button you prefer.
Sources:
John Paul Herold - Scroll Like A Ninja - Logitech M570 Trackball & Linux Mint